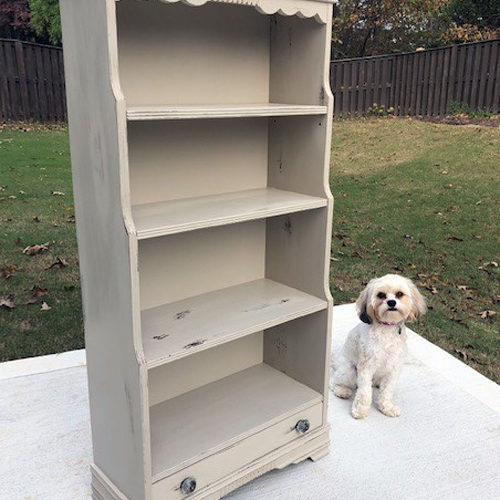
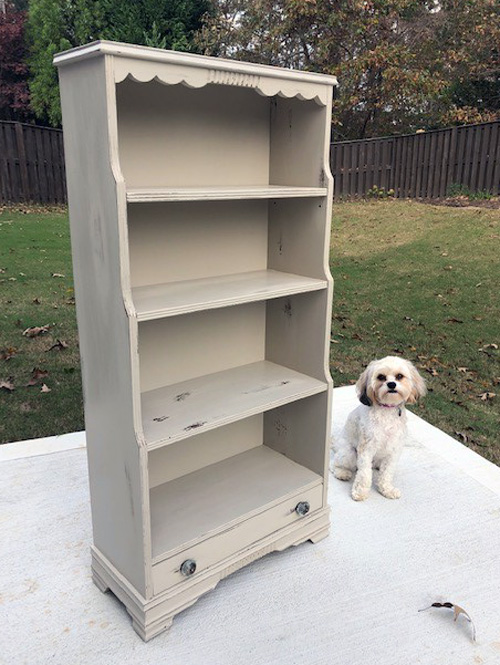
Refinishing this bookcase has been on my project list for several years. I’ve never refinished a piece of furniture, but with all the DIY help I knew I could get on the interwebs, I felt confident of my chances. And, I’m so pleased with the end results!
First, a bit about why I would attempt refinishing this bookcase. It was in my bedroom growing up. But before that, it was in my mother’s bedroom when she was a little girl. This means it is at least 80 years old, and very likely, it belonged to her grandmother – my great-grandmother – which means it could be 100+ years old. I’m not just giving up on something with that sort of history. Also, it is solid maple, so I knew it should stand up to the rigor of stripping and sanding with – what I hoped would be – good results.
Before I get into the process for refinishing the bookcase, here’s the tools I used:
- PPE: rubber gloves, goggles and mask
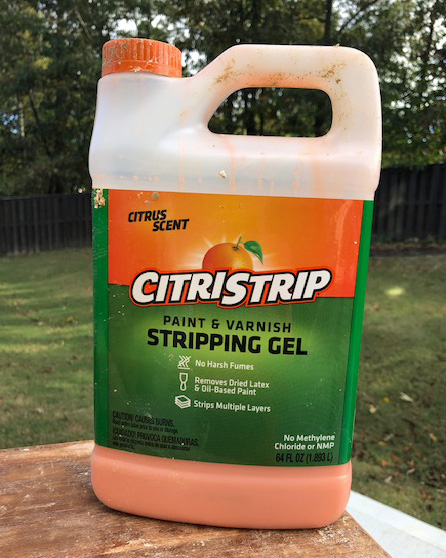
- Stripping: CitriStrip and Kwik-Strip (more on these later)
- Cheap natural bristle paint brush & plastic cup
- Various size plastic putty knives
- Drop cloth
- Double-bagged paper bag
- Disposable shop cloths (a roll of paper towels would have been just as good)
- Steel-tooth brush
- Plastic wrap
- Electric hand sander with 150 and 220 sand paper
- Additional 220 sander block
- Stain & paint
Prep Work: The first step in refinishing was cleaning the bookcase with mild detergent. I also set up a work area in my basement on a card table with all my tools.
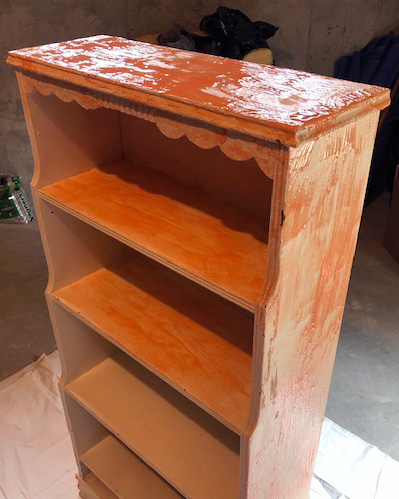
Stripping: I used the CitriStrip for 95% of the stripping. Because there were 4-5 (and very old) coats of paint, this step required repeating the process at least twice for every surface. CitriStrip has little to no smell. I completed this step in my basement where I had a window and door for ventilation, but was OK even without that.
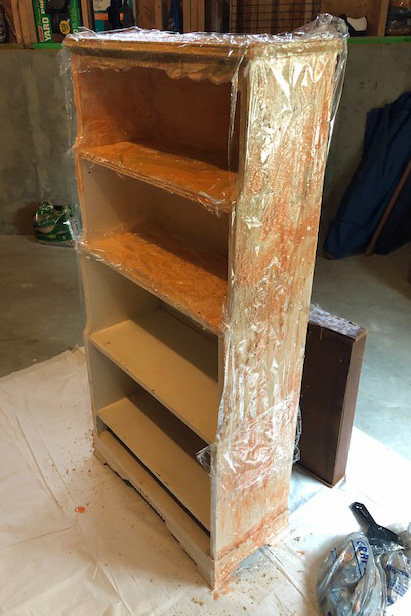
With the paint brush, apply a thick coat of CitriStrip gel to the surface. Apply plastic wrap over it to keep the moisture in. (One site that I read offered this as a “hot tip.” Another said it was a part of the process. I’d say it is part of the process.) Leave for 6 – 12 hours. With the plastic putty knife, scrape away paint that has bubbled up. I also used the metal bristle brush to “scrub” the layer of paint, hopefully helping the stripping gel to work better. I have no idea of that helped or not.
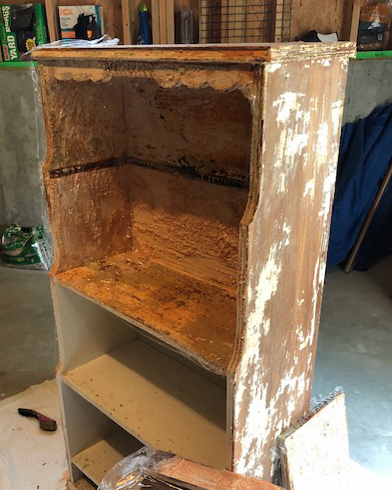
I developed a cadence of working first thing in the morning, applying more stripping gel, and coming back to it in the afternoon. I “pushed” the paint layers into the paper bag and used the shop towels to wipe off the putty knife. Stripping took about four days.
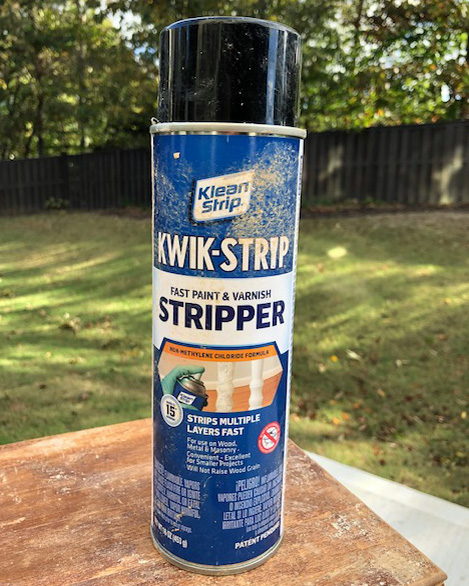
For more stubborn areas, I used Kwik-Strip. It works in 15-30 minutes, and you can tell from the smell that is it much more powerful. You’ll definitely want ventilation if you use this. And, if you’re looking to complete the stripping step in one day, you could use exclusively, but I’d only do that if I were outside.
Detailing: While you’ll want to use the plastic putty knife for the primary job of removing the paint, I did use a metal putty knife – very gently – to help me with some of the finer details.
Also, I figured out pretty quickly that I’d replace the particle board backing of the bookcase – that wasn’t worth stripping. For $15, I had the nice fellow at our big-box home improvement store cut a new one. I was prepared to brace the shelf with a strip of wood when I removed the back, but as it turned out, the bookcase was sturdy enough on its own. Had I known this, I would have removed the back on day one instead of day five, which would have greatly assisted with stripping the shelves.
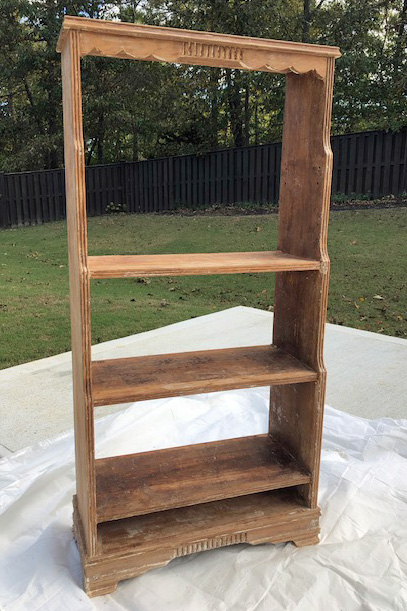
Sanding: Using a hand sander, I sanded the entire bookshelf first with 150 grade and then a finer 220 grade sand paper. I completely wiped down and dusted between the two steps. I used the sanding block to sand some of the detail areas, but the hand sander was much more adept at getting into crevices than I gave it credit for initially.
Staining: The next step in refinishing the bookcase was staining the bare wood with the color that I wanted underneath the final coat of paint to show through for the antiquing. Since the paint color would be light, I picked a darker stain for the contrast.
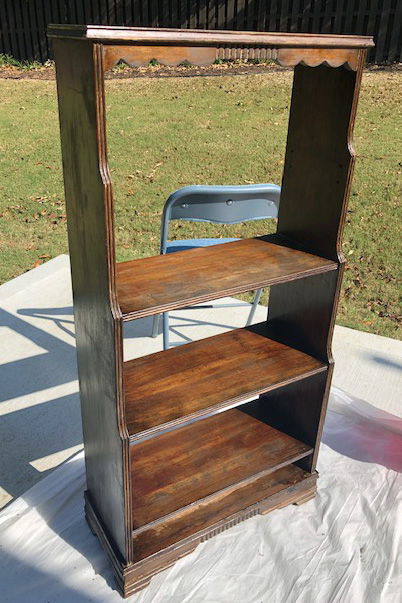
Painting: I missed getting a photo in this phase. For me, this was the most nerve-wracking because I was afraid of getting streaks or brush marks. I soon realized that even if I did, my next step was going to cover a multitude of sins.
Sanding for distress: After letting the bookcase dry for two days, I used sandpaper to mimic years of wear in those places where wear would naturally occur: around the knobs of the drawer, on raised portions of the decorative molding, near the edges of the shelves. I used the finer sandpaper where I wanted less distress and a rougher sandpaper where I wanted more distress.
Hardware: I replaced the knobs on the drawer with some beautiful antique looking knobs I bought for a song on the internet. I did run into a bit of an issue with them because they had a screw attached that was much longer than I needed. I engaged my husband to help at this point but when he clipped it, it stripped the thread so that the nut no longer worked. Ace Hardware to the rescue. A kind associate made a clean cut on both screws based on markings I made.
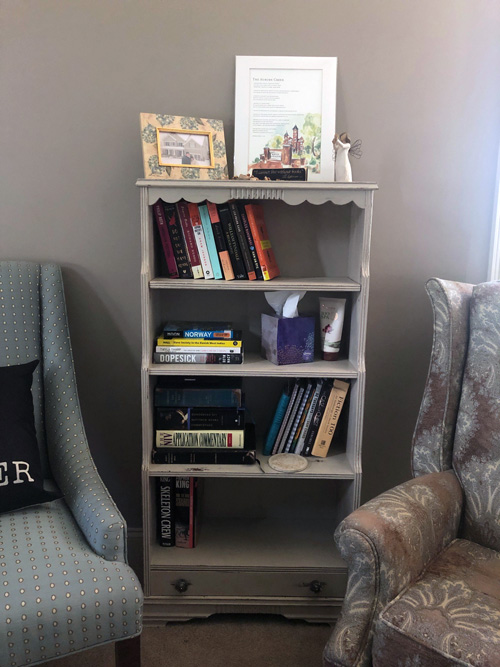
A quick dusting all over with a damp rag and the bookcase was ready for its final resting spot – between two chairs in my office / reading room / library.
I really am very pleased with how my antique bookcase – old and restored to look old again – turned out!


Comments
Powered by Facebook Comments