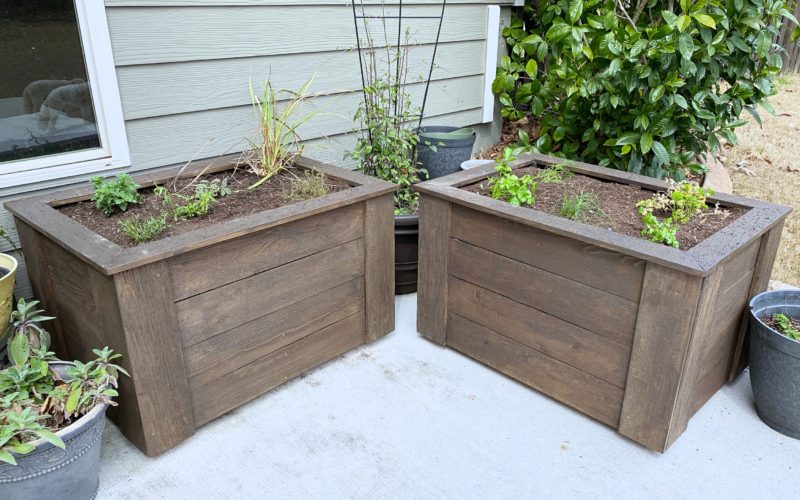
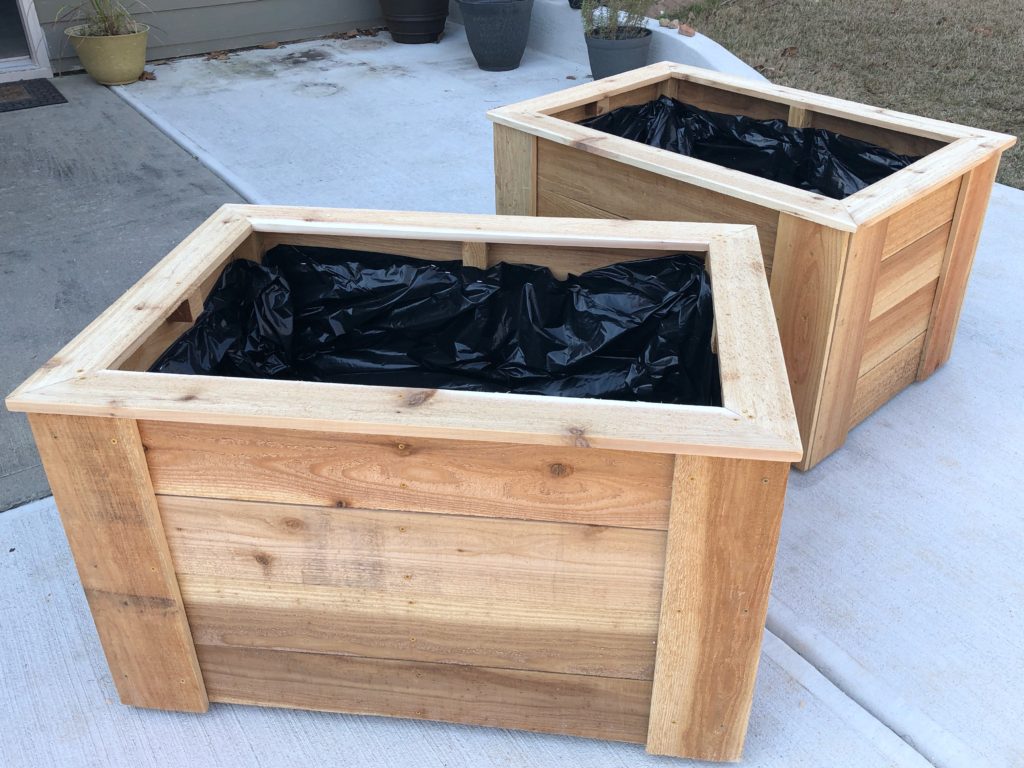
For many years I’ve kept my herbs in pots. Last year, I had so many that it was a pain when I needed to move them, not to mention the process of watering. I had such success with my last L&L Project, I decided building a DIY planter box couldn’t be too hard.
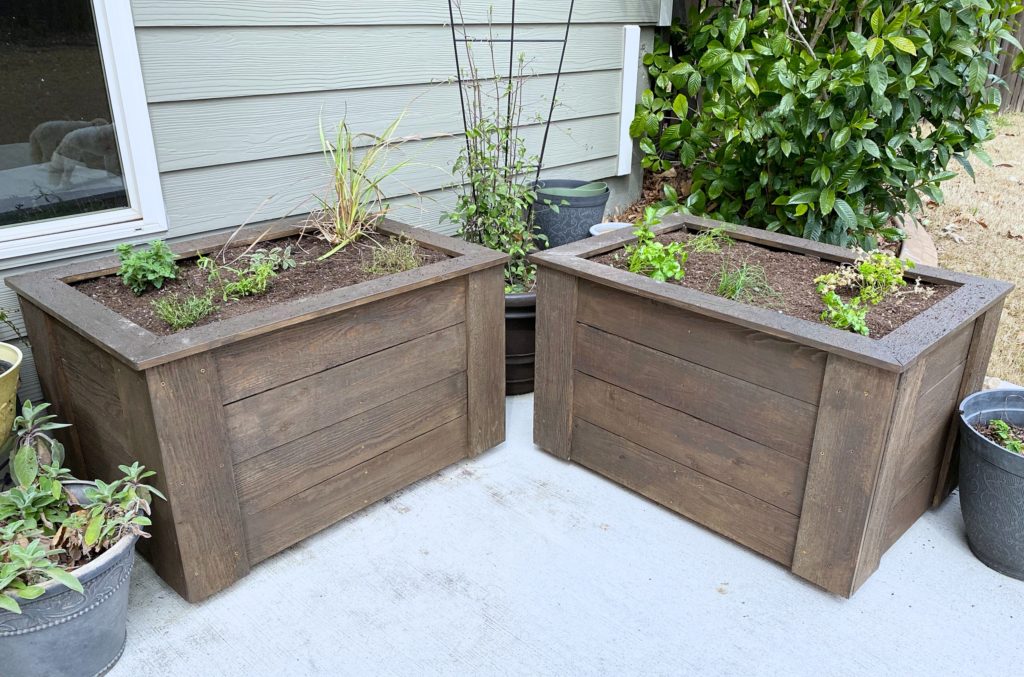
I searched the internet for ideas and found this video from Mr. FixItDIY that came with downloadable instructions. His DIY planter box is 2×4, which was a little long for me, so I opted for two 2X3 boxes. (The instructions below are for a single 2×3 DIY Planter Box.)
The instructions from Mr. FixItDIY provide helpful diagrams, but some things in his plan didn’t work out quite right. So, if you’re planning on building one yourself, I suggest you study both. And, just as I did, it is easy to tweak the dimensions to your preference.
2X3 DIY Planter Box
Materials
- 2×2 Cedar: (frame)
- 2 pieces 3 feet each
- 6 pieces 2 feet each – cut further down to about 21 inches (save scraps)
- 2×4 Cedar: (base)
- 8 pieces 2 feet each
- 6 feet Dog-Eared Cedar Fence Planks
- 8 pieces 3 feet each (long side)
- 8 pieces 2 feet each (short side)
- 8 pieces cut to size (about 21 inches) (side trim)
- 1×4 Cedar (top trim)
- 2 pieces 2 feet
- 2 pieces 3 feet
- Wire Mesh (2×3 piece)
- Black plastic (we used 3.5 mil sheeting found in paint section)
- Deck Screws (multiple sizes)
- 2.5 or 3 inch for frame, base and attaching sides
- 1 1/4 for attaching trim
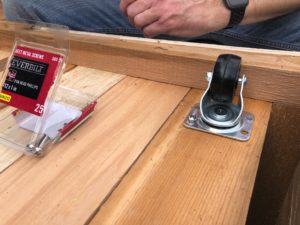
- 4 Casters (3 inches)
- 16 #12 1 inch pan head screws for casters
- Stain (optional)
Tools
- Circular Saw
- Drill(s) – see helpful hints
- Tape measure
- Pen / pencil for marking
- Staple gun
- Wire cutter (helpful if you have to cut wire mesh)
- Sander (brushing off any rough edges)
Steps
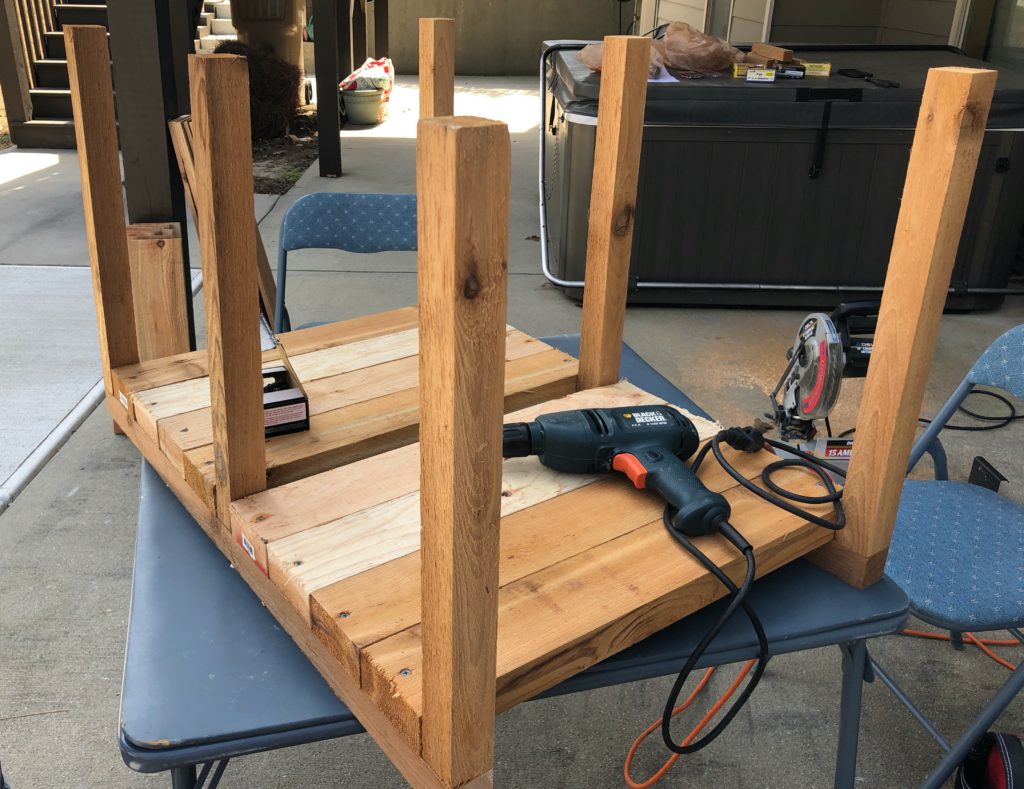
- Cut the 2x2s. For us, the long piece was 3 feet. The short pieces were about 20.5 inches. (Save the scraps for later.) To measure the short pieces, I recommend cutting the 4 pieces of plank for the sides and measure where to cut based on that. The plank widths are not exact, and we ended up with one set of four that was a good 1/2 inch wider than the others. Luckily, we caught it in time and were able to mix wide & narrow pieces.
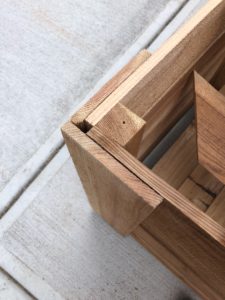
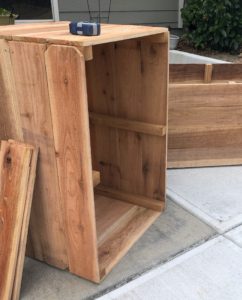
- Build the two “E” frames with 2×2 – the “U” frame plus a middle for support. (This was optional on the plans I used, but I think it helps make the box sturdier.)
- Connect the two frames with 2×4 for base.
- Add planks for both long sides and then for short sides.
- Cut planks to add for side trim. Again, you may want to use the actual sides to mark and cut the trim.
- Attach casters in the corners on base 2x4s. Make sure there’s good clearance for the caster to turn.
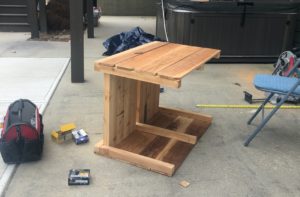
- Cut & add trim to top. Use the box to measure one long side and one short side (should be about 2 feet and 3 feet each). Then, use those to cut their opposite side exactly the same. We used the rough side up on the trip to match the texture of the rest of the box.
- Use a piece of scrap 2×2 on the short sides to help brace the trim. (The long sides won’t need it if you use the additional middle piece.)
- Add wire mesh to the bottom of the box. (Keeps critters from burrowing in from the bottom.)
- Add black plastic over wire (and filling), using a staple gun to fix in place. Punch holes in plastic to allow for drainage before filling with dirt.
- Stain box. (optional)
Helpful Hints
- I’m using this box for herbs, so I didn’t want to use wood that was pressure treated. Also, cedar is naturally bug and rot resistant.
- If you have two drills, it will save time to have one for pre-drilling holes and the other for driving the deck screws.
- The plans we used suggested a 1/4 inch gap between the planks. We didn’t do this.
- The plans also suggested using planks for the top trim. Because the widths and edges were so unreliable, we opted for cedar 1×4 and are very pleased with the finished product.
- We went back and forth on 2.5 inch vs. 3 inch casters. In the end, to ensure clearance with the weight of the dirt, we opted for 3 inch. The casters are recessed and because I’d like to (potentially) move these into my basement in the winter, I wanted to make sure I have enough e space to roll the box over a threshold. (The plans indicated 2 inch castors which means there would have been zero clearance.)
- We added filling to the bottom of the box for a) less dirt and b) not as heavy a box to move. We used some old styrofoam coolers to take up about 6 inches on the bottom.
If you make your own DIY Planter Box, let me know and (of course) share pictures!

Comments
Powered by Facebook Comments